


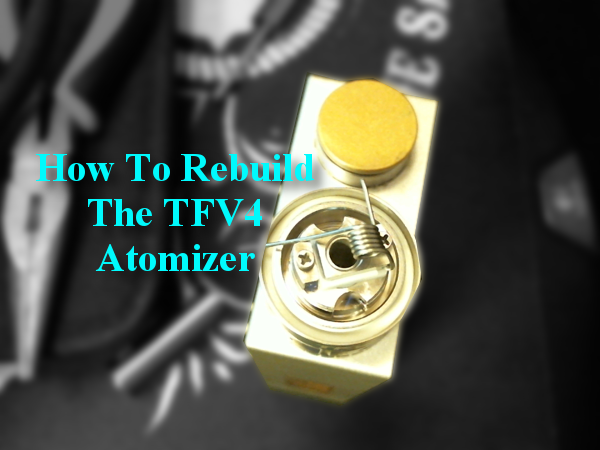
How To Rebuild The TFV4 Atomizer
How To Rebuild The TFV4 Atomizer

So, you want to learn how to rebuild the TFV4? Voted Guide To Vaping’s Best Clearomizer and RTA of 2015, the TFV4 is currently the most popular tank on the market. From its patented triple coil system, its quads and even the Clapton’s originally designed for the TFV4 Mini, the TFV4 has a plethora of pre-made coils ready to install right now. But, if you are anything like me, sometimes you just need to try something other than what the company provides. The TFV4 has a versatile build deck that is easy to use and today, we are going to take a look at the various parts, throw some coils together, and install them. Coil building is a simple operation that with time and patience you can become proficient in, not just for the TFV4, but for any tank or RDA you may wish to use.
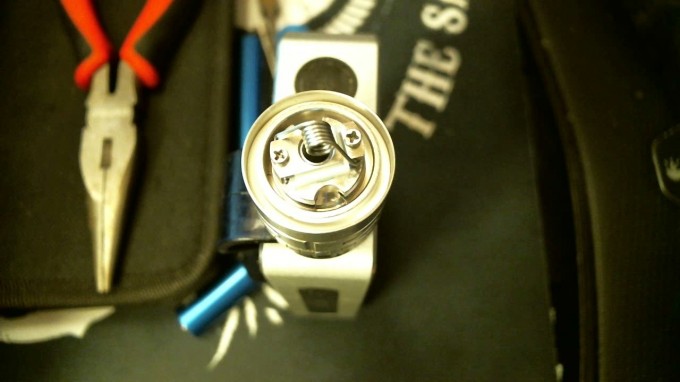
Rebuilding The TFV4 Single Coil Deck

Although not necessarily the easiest deck to build on the TFV4 single coil deck, when built correctly, it gives off amazing flavor and cloud production. For this tutorial I will be building with 22 gauge Kanthal A1 on a 3mm Coil Master V3 jig.
IMPORTANT NOTE: Whether this is your first coil build or you have built thousands before, keep safety in mind. Know the limit of your hardware and know the resistance of your build before you start. Using a resistance calculator like steam-engine will help you get into the right ball park, but always check your builds with an ohm reader. You may have a hard short somewhere that you don’t see with the naked eye and an ohm reader can help save you time and money by telling you that your build wont fire before you put everything back together.
 List Of Items I Will Be Using:
As I am sure this is probably not your first foray into coil building, I will not bore you with the initial wrapping of the coils, other than to tell you that after consulting with Steam Engine I decided to go with a 5/6 wrap on the 3 mm Jig, which will give me a reading of around 0.4 Ω. I left the legs on both sides of the coil approximately 3/4 inch in length at this point, to ensure that I will have enough leg to put through the holes in the deck. Although I have seen some people wrap the legs around the screws in the deck, I would rather take the extra few minutes to install the coil correctly.

5/6 wrap, 22 gauge Kanthal A1 on 3 mm Coil Master V3
Step 1. Remove top cap from RBA section and ensure that there is no debris from previous builds in the deck area. This could include old coils, pieces of old wicking or even juice build up if the deck has been used before. If this is the first time you have used the RBA, you probably just found a coil in there that was installed at the factory – we will class that as debris.
Step 2. Insert coil into one of the post holes on the side of the deck. Decide exactly where you will need to make your bend in the leg so that the coil will end up centered over the hole. Remove the coil and use pliers to bend it in the location you picked, making sure it is pointing in the right direction (it should be going parallel to the coil).

Step 3. Insert back into deck and adjust it so that it is centered and measure where you will bend the other leg. Remove the coil and once again use pliers to make the correct bend. Remove the excess from the legs, leaving enough to go through the center of the deck posts.

Step 4. This is probably the most difficult part, but take your time and it will fall into place. Insert the legs into either side of the deck. The first side just slides in but the second will take some adjusting. I have found it is easier to use a pair of tweezers to gently twist the leg into position and through the hole.

Step 5. Making sure that the coil isn’t touching both sides of the deck between the negative and positive, tighten down the screws and check your resistance. Insert the RBA section into the base of the tank if you have not already done so for the next step.

Step 6. With a device set to low out put (I started of at 19 watts) gently pulse the coil and adjust it until it glows evenly from the center to the outside edge. You can achieve this by pinching the coils with pliers and then running a flat-headed screw driver across the wraps a few times. Pulse and check until everything is even. When you have even coils, tighten the screws again, just to be sure.
Step 7. The coil is in place, and now it is time to wick this beast. I use Japanese cotton, small 2.5 inch square sheets that I pull in half and then cut down the center. This is my personal preferred technique although there are many others that you can find online. I roll it gently and insert it into the coil making sure of plenty of overlap on either side. Aim the wicks into the juice channels on the side of the deck and then use the top cap to mark its position on the wicks ( just put it on and give it a twist, it will show you where to cut the wicks at).

Step 8. Trim the wick at the marks left by the top cap. The wicks should be inside the juice channels but not blocking them. Place the top of the RBA section in place and using either a piece of Kanthal or the end of the tweezers, adjust the wicks inside to fill the space either side of the coil at the base. When you are satisfied with the positioning of the wicks, add a few drops of e-liquid directly onto the coil to pre-soak the wicks.

Step 9. Reassemble the TFV4 and fill it up. If you got the wicking right, you should have no trouble with leakage. I would wait for a minute or 2 before starting t use the coils, at low-wattage at first before working up to the power setting you want to vape at.
step 10. If everything went according to plan, you should now have a fully functioning rebuilt TFV4 RBA. It may take a few attempts to get the correct wicking down for your personal e-liquid, due to viscosity levels being different. I am using a 70 VG /30 PG blend which is highly unlikely to leak with the set up I have described, but if you are using higher PG levels you may want to plug up the juice wells a little more.
As always, enjoy your vaporizer and vape safe!

